Notes of Class 10th, Computer ICT -WPS PPT.pptx - Study Material
Page 3 :
The PowerPoint window has toolbars that help you quickly to create presentations. Most of the toolbars are common in Office applications., Title bar: Displays the document name followed by a program name, Menu bar: Contains a list of options to manage and customize documents, Standard toolbar: Contains shortcut buttons for the most popular commands, Formatting toolbar: Contains buttons used for formatting, Status bar: Displays slide position and the type of design in PowerPoint, Drawing toolbar: Contains tools for drawing lines, shapes, and objects, Help: Provides quick access to help topics, The parts of the PowerPoint window
Page 4 :
PowerPoint XP has a new default Normal view called the Tri-pane view. , This view, which opens when you launch PowerPoint, allows you to see multiple parts of a presentation at once., task pane is located on the right side of the computer screen, this pane allows you to select tasks in different categories and lets you quickly enhance your slides in a few steps.
Page 5 :
The view buttons at the bottom-left corner of the screen allow for three slide views: Normal view, Slide Sorter view, and Slide Show view., The view buttons can be useful as you prepare your presentation. They control the way slides are displayed on the screen. , Normal view: contains the Outline and Slides tabbed panes on the left, the Slide pane in the center, and the task pane on the right., Outline view: shows the text of your presentation for easy editing., Slides view: shows text and graphics of the slide you're working on., You can also add note to your slide at the bottom of the slide., View buttons and slide views
Page 6 :
Slide Sorter view: lets you see small versions of all the slides you have created. You can delete, copy, and move slides in this view., Slide Show view: lets you see your presentation electronically as it will appear to an audience., More views
Page 7 :
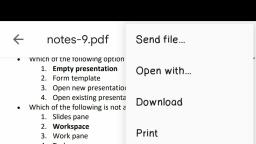
Creating a blank presentation, PowerPoint offers three ways to create a presentation: Blank presentation, From Design Template, and From AutoContent Wizard., The blank presentation option is one of the more commonly used methods. It offers several blank slides with layouts for text and graphics., To create a blank presentation:, Open PowerPoint., A slide featuring a place for a title and subtitle appears by default. You can begin your presentation with this slide or choose a different slide layout., The New Presentation Pane appears on the right side of the screen., Under New, click Blank Presentation., A list appears, then you can choose which layout you want., Creating a Blank Presentation
Page 8 :
To insert a new slide:, Click Insert New Slide ( Ctrl+M )., Move your arrow pointer over the layouts or use the scroll bar and choose a slide layout., A gray bar appears on the right., Click the down-pointing arrow and choose Insert New Slide., Inserting a new slide
Page 9 :
As you work on your presentation, There are different type of layout you want. If you want a slide with text and clip art or one with text and a chart., To choose a slide layout:, Move your arrow pointer over the layouts or use the scroll bar in the Slide Layout pane., A gray bar appears on the right of each layout., When you find a layout you like, click the down-pointing arrow and choose Apply to Selected Slide., Placeholders:, Once you choose a layout for your slides, you can begin adding text, graphics, and other items. You do this with placeholders—special places within a slide where you can add content., To add text to a placeholder:, Click the placeholder., Start typing., Choosing a slide layout
Page 10 :
Copying is another technique you may use as you work on your slide presentation. , For example, you may want to repeat a slide later in the presentation or copy a slide and make slight changes to it to make a different point., To copy a slide:, Click the slide you want to copy in the pane on the left., Click Copy on the Standard toolbar ( Ctrl+C )., Move the arrow pointer to where you want the copied slide to appear., OR, Right-click the slide you want to copy in the pane on the left., Move the arrow pointer to where you want the copied slide to appear., A horizontal cursor appears., Click Paste on the Standard toolbar or right-click Paste ( Ctrl+V )., Copying a slide
Page 11 :
Sometimes you may want to take one or more slides out of your presentation., , To delete a slide:, Click the slide., Press Delete on your keyboard., OR, Right-click the slide you want to delete in the pane to the left, Deleting a slide
Page 12 :
To insert a shape:, Click on Home Tab., At the Ribbon, Select the shape you want to insert in slide., Click and drag your mouse to draw the shape, where you want to draw in the slide., , OR, , Click on Insert tab., At the Ribbon, Click on the Shapes, Many shapes will appear among you select which you want to insert in slides., Click and drag your mouse to draw the shape, where you want to draw in the slide., Inserting Shapes
Page 13 :
A chart is a tool you can use to communicate your data graphically. , Displaying charts in PowerPoint allows your audience to see the meaning behind the numbers, and it makes showing comparisons and trends much easier., , To insert charts:, To insert the charts, First you need a data which is store in excel sheet., Click on insert tab., Click on chart, The dialog box is appear on the screen., There are many types templates that the MS Presentation provide you, Select a Template which you want.( The excel sheet will open simultaneously and the chart will appear in your slide. ), Charts
Page 14 :
Tables are another tool you can use to display information in PowerPoint. , A table is a grid of cells arranged in rows and columns. , Tables are useful for various tasks, including presenting text information and numerical data., , To insert the Table:, On the Insert tab on the Ribbon, click the Table button in the Tables group and then choose Draw Table from the menu that appears. , Draw the overall shape of the table by dragging the mouse to create a rectangular boundary for the table. Click the Draw Table button in the Table Tools Design tab. , OR, You can take it from the spreadsheet which you already created before by selecting on Excel Spreadsheet., Inserting Tables
Page 15 :
WordArt is a quick way to make text stand out with special effects. You begin by picking a WordArt style from the WordArt gallery on the Insert tab, and then customize the text as you wish., , To insert a WordArt:, click at Insert > WordArt., There are variety of design you can choose whichever you want., Inserting WordArt
Page 16 :
A collection of pages arranged in sequence that contain text and images for presenting to an audience., Before you present your slide show, you'll need to think about the type of equipment that will be available for your presentation. , Many presenters use projectors during presentations, This allows you to control and preview slides on one monitor while presenting them to an audience on another screen., Slide show
Page 17 :
To start a slide show:, press the F5 key at the top of your keyboard. The presentation will appear in full-screen mode., OR, Select the Slide Show view command at the bottom of the PowerPoint window to begin a presentation from the current slide., OR, Go to the Slide Show tab on the Ribbon to access even more options. From here, you can start the presentation from the current slide or you can start from beginning of the slide.
Page 18 :
Saving your presentation/file means to keep the file safe in the computer memory so that you can get the file at any time you want., , , To save the Presentation, Create your presentation , Click on File at top left corner of window that is at title bar., Click on “save as” button , In the save as display box type your file name and select the location of your file where you want to save., Save
Page 19 :
WPS Presentation - Support PPT and PPTX Files., This means you can open and edit presentations from others, and then save them right from WPS Office knowing others will be able open them without any issues., File Format of WPS Presentation
 Learn better on this topic