Notes of BSC GEN 1ST GAYATRI, Computer Fundamental & Computer Application & Computer Hardware & computer maths & TIME:10.30-11.30 AM Home Tab (1).pdf - Study Material
Page 1 :
WORDPAD, WordpadI. is a simple word processor., Wordpad allows simple formatting like : Change font, Character level formatting, Margin can be created or changed, Insert bulleted list, graph, and sound files, Wordpad lacks of powerful features of other word processors, such as creating tables and, spell checking., You don’t need to press enter. When you reach the right margin word processor wiil move, to the next line automatically. This is called soft return., The only time you need to press enter is to create a new paragraph, is called hard return., , How To Open WordPad :, I., , Click start button, , II., , Click “All programs”, , III., , Click “Accessories”, , IV., , Click “Wordpad”, , Small Box To The Left Of The Home Tab :, However the mouse pointer over the box will tell us that it contain functions that enable you, to open, save, save as, print, page setup, send e-mail, exit. To do these options to your, document follow the rues :, Click on the down arrow beside the small box--- Now the menu will open, I., , New :, This will give you a new wordpad screen, , II., , I., , Open any exiting wordpad document, , II., , Now click ” File” --- click “New”, , III., , Short cut key is “Ctrl + N”, , Open :, This will give you a new wordpad screen, I., , Create a new wordpad document, , II., , Now click ” File” --- click “Open” ---on the open dialog box type the name, of the document that you want to open., , III., , Short cut key is “Ctrl + O”
Page 2 :
Save:, This fuction is used when you make changes to an exiting document, You want to resave the document with the changes, a. Type some text, b. Save that document with a name, , e.g. word.RTF, , c. Now open the saved document (word.RTF), d. Add some text and some formating, e. Then click “Save” to resave that document in same name, f. short cut key is “Ctrl + S”, II., , Save As :, You must use this option to give your document a name and tell the computer, what format you want to save your document into., The right pointing arrow will take you different ways you can save your, document., a. Type some text, b. Go to “file”, c. Click “Save As”, d. Save that document with a name, , e.g. word.RTF, , e. short cut key is “Ctrl + S”, III., , Print :, This option allows you to print a document in 3 different ways :, i. Select printer and number of copies and print, ii. Quick print :, directly go to the printer, iii. Print preview :, Which allows you to see your document as it will be printed, , IV., , Page Setup :, This is where you can select the paper size and source, portrait and landscape,, margin, and print page number., , V., , Send In An E-Mail :, Enable you to send to your document as an e-mail attachment, , VI., , About WordPad :, Statistical data about your version of wordpad., , VII., , Exit :, Allows you to exit wordpad and close down the wordpad screen.
Page 3 :
A., , Home Tab:, The home tab has 5 group, I., , Clipboard, , II., , Font, , III., , Paragraph, , IV., , Insert, , V., , Editing, , 1. Clipboard Group:, In clipboard group there are 4 options are available., i. Cut, ii. Copy, iii. Past, a. Cut :, It will remove selected / highlighted text from a document and save, on clipboard, i. Select some text, ii. Go to clipboard group, iii. Click “Cut”, OR, iv. Select text by using keyboard, Press & hold “Shift” key and press arrow key(left. Right, up,, down)., v. Then press “Ctrl + X” from keyboard., OR, vi. Select text-- right click--click on “cut”, , b. Copy :, It will leave selected / highlighted text where it is, but copy it so we, can place it else where on your document., i. Select some text, ii. Go to clipboard group, iii. Click “Copy”, OR, iv. Select text by using keyboard, Press & hold “Shift” key and press arrow key(left. Right,, up, down)., v. Then press “Ctrl + C” from keyboard., OR, vi. Select text-- right click--click on “copy”
Page 4 :
c. Paste :, It is a command mostly used to paste text, paragraph after cut or copy, from one place to another. Click on the down arrow beside the paste for, more paste options, i. Select some text, ii. Go to clipboard group, iii. Click on “paste” option, OR, iv. Select some text by using keyboard, Press & hold “Shift” key and press arrow key(left. Right,, up, down)., v. Then press “Ctrl + V” from the keyboard, OR, vi. Select text-- right click--click on “paste”, , 2. Font Group :, In font group there are 14 options are available., I., , Font family, , II., , Font size, , III., , Grow font, , IV., , Shrink font, , V., , Bold, , VI., , Italic, , VII., , Underline, , VIII., , Strikethrough, , IX., , Subscript, , X., , Superscript, , XI., , Text Highlighter, , XII., , Font color, , a. Font :, This option is used to change the font style for selected text., I., , Type some text, , II., , Select the text, , III., , Go to home tab --- In font group -- click on font family --clicking on the down arrow to show more options., , IV., , From that list choose one of them., OR, , V., , Type some text, , VI., , Select the text using keyboard “shift + arrow key”, , VII., , Press “F10”--- press “H” --- the press “FF”-----press, the ”down arrow” for more options.
Page 5 :
b. Font Size :, This option is used for change the selected text size., I., , Type some text, , II., , Select the text, , III., , Go to home tab --- In font group -- click on font size --clicking on the down arrow to show more options., , IV., , From that list choose any size ., OR, , V., , Type some text, , VI., , Select the text using keyboard “shift + arrow key”, , VII., , Press “F10”--- press “H” --- press “FS” --press the, ”down arrow” for more option., , VIII., , c. Grow font :, The capital, , A, , will enlarge the selected text size., , i. Select one letter from a word, ii. Then click Grow font (A), OR, iii. Select one letter from a word, iv. Press “ctrl + shift + >”, OR, v. Select one letter from a word, vi. Press “F10”--- press “H” --- press “FG”, , d. Shrink Font :, The smaller A will shrink (reduce) the font size, i. Select one letter from a word, ii. Then click shrink font(A), OR, iii. Select one letter from a word, iv. Press “ctrl + shift + <”, OR, v. Select one letter from a word, vi. Press “F10”---press “H”----press “FK”
Page 6 :
e. Bold :, This will bold the selected text., I., , Select some text, , II., , Click “B”, , III., , Now the selected text will be bold., OR, , IV., , Select some text, , V., , press “Ctrl + B”, OR, , VI., , Select some text, , VII., , Press “F10” --- press “H” --press “1”, , VIII., , Now the selected text will be shown in bold, , f. Italic :, This will italic the selected text., I., , Select some text, , II., , Click "I “, , III., , Now the selected text will be italic., OR, , IV., , Select some text, , V., , press “Ctrl + I’”, OR, , VI., , Select some text, , VII., , Press “F10” --- press “H” --press “2”, , VIII., , Now the selected text will be shown in italic, , g. Underline :, This will underline the selected text, I., , Select some text, , II., , Click “ U “, , III., , Now the selected text will be underlined., OR, , IV., , Select some text, , V., , press “Ctrl + U”, OR, , VI., , Select some text, , VII., , Press “F10” --- press “H” --press “3”, , VIII., , Now the selected text will be shown in italic
Page 7 :
h. Strikethrough :, This will place lines through text to indicate that the text is deleted., I., , Select some text, , II., , Click abc, , III., , Now the selected text shown as to be deleted from your document., OR, , IV., , Select some text, , V., , Press “F10” --- press “H” --press “X”, , i. Subscript :, A subscript is a number, figure, symbol that appear smaller than the normal, line of the text size and it is slightly below the baseline / normal line of the, text size., I., , Type some text, , e.g. log102, , II., , Now select “2”, , III., , Then click subscript (X2), OR, , IV., , Select some text, , V., , press “Ctrl + =”, OR, , VI., , Select some text, , VII., , Press “F10” --- press “H” --press “5”, , VIII., , Now the text “log102” will be shown like following, , Log102, j. Superscript :, A superscript is a number, symbol, figure that appear smaller than the normal, line of the text size and it is slightly above the baseline / normal line of the, text size., I., , Type some text, , II., , Now select the number “2”, , III., , Then click the superscript (X2), OR, , IV., V., , Select some text, press “Ctrl + Shift + =”, , e.g. (x + y)2=x2+y2+2xy
Page 8 :
OR, VI., , Select some text, , VII., , Press “F10” --- press “H” --press “6”, , VIII., , Now the text “(x + y)2=x2+y2+2xy” will be shown like following, , (x + y)2=x2“(x + y)2=x2+y2+2xy, k. Highlight Text :, It is text highlighter. It will highlight text as if you had used a highlighter. It will, color the background of only the selected text. The down arrow will give you, the choices of 15 different colors., I., , Type some text, , II., , e.g. The poor person has no friends, , Select the sentence, , III., , Now apply the text highlighter, , IV., , Click the down arrow for different choices, OR, , V., , Select some text, , VI., , Press “F10” --- press “H” --press “H”, , VII., , After applying the highlighter, the selected text would like, The poor person has no friends, , VIII., , If you want to remove the highlighter, then go to “highlighter” and, click the down arrow and select “No Color”, The poor person has no friends, , l. Font Color :, The font color will change the color of your selected text color., i. Type some text, , e.g. I love education but without examination, , ii. Select the text, iii. Click “Font Color”, iv. If you want different color click on the down arrow and select any, color., OR, v. Select some text, vi. Press “F10”--press “H”--press “C2”, vii. If you want more color, then click “More Color” and select any, color, and click “OK”, viii. After applying the text color, the selected text would like, I love education but without examination
Page 9 :
3. Paragraph Group :, In paragraph group there are also 9 options are available., i. Decrease Indent, ii. Increase Indent, iii. Start A List, iv. Line Spacing, v. Text Alignment, a. Align text left, b. Center, c. Align text right, d. Justify, e. Paragraph, a. Decrease Indent :, Indenting is allows you to set text within a paragraph at different margins., It will move indented, bulleted, numbered text to the left of the page ., b. Increase Indent :, Indenting is allows you to set text within a paragraph at different margins., It will move indented, bulleted, numbered text to the right of the page ., c. Start A List :, “Start a list” list make your document more readable and visually, interesting ., 1. Type some animals name vertically, 2. Then select the names, 3. Go to “paragraph” group--click on “Start A List”, a. If you want more list click on the “Down Arrow” next to, “Start A List” for more options, d. Line Spacing :, Set line spacing and indent. You can use space between lines., I., , Select the lines, , II., , Click “Line Spacing”, , III., , Click the down arrow for more options, , IV., , Then select one of them
Page 10 :
e. Test Alignment :, 4 boxes with lines shows the position of text on your document., a. Align Text Left : (Box 1), Text start at left margin., 1. Select the box 1 (Align Text Left), 2. Then type text, 3. The text is start at left, , e.g. Love your job but don’t love, your company, because you may not, know when your company stops, loving you, , 4. Short cut key is “Ctrl + L”, b. Center :, If you select this box, then text start at center., 1. Select the box 2 (Center), 2. Then type text, , e.g. Love your job but don’t love your company,, , because you may not know when your company stops loving you, 3. The text is start at center, 4. Short cut key is “Ctrl + E”, c. Align Text Right :, Text is right justified., 1. Select the box 3 (Align Text right), 2. Then type text, , e.g. Love your job but don’t love your company,, , because you may not know when your company stops loving you, 3. The text is start at right, 4., , Short cut key is “Ctrl + R”, , d. Justify :, Text is justified both left and right align., Short cut key is “Ctrl + J”
Page 11 :
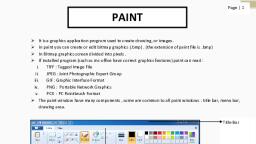
4. Insert Group :, In insert group there are 4 options are available, i., , Picture, , ii., , Paint Drawing, , iii., , Date & Time, , iv., , Insert Object, , a. Picture :, You can insert a picture. Click the down arrow to change, resize a picture, i., , Select a place where you want to insert a picture, , ii., , Go to “Home” tab--On the “Insert Group”--Click “Picture”, , iii., , Now the “picture library “ will open--Select any picture, , iv., , Then click “OK”, , v., , If you want to change the opened picture, then click on the down arrow, under the picture, , vi., , Then click ”Change Picture”, , vii., , If you want to resize the opened picture , first you have to select that, picture, , viii., , Then click the down arrow under the picture, , ix., , Resize dialog box will appear--now change the “horizontal” and, “vertical” values, , b. Paint Drawing :, You can insert a paint drawing you did in ms paint., i., , Select a place where you want to insert a paint drawing, , ii., , Go to “Home” tab--On the “Insert Group”--Click “Paint Drawing”, , iii., , Now the “ms paint “ will open--Now draw any shapes and color them, , iv., , Then click the “Close” button, , v., , Now the paint drawing will open in word pad automatically
Page 12 :
c. Date & Time :, i., , Click on “Date & Time” for a small selection of date & time format / style, , ii., , Now “Date & Time” dialog box will appear with some format, , iii., , Now choose any one format for date--then click “OK”, , iv., , Again click on the “Date & Time” --then choose any one format for, Time, , v., , Then click “OK”, , d. Insert Object :, You can insert a graph, text, etc from Microsoft packages., i., , Click on “Insert ” to insert any text, graph or any other formatting, , ii., , Now the dialog box “Insert Object” will appear, , iii., , Select “Create New” option button for creating your own designs, , iv., , Then click “OK”, , v., , Now select any package from “object type ” list box, , vi., , Select “Create from file” option button for insert exiting document, , vii., , Now type the location on the text box or click on “Browse” button, , viii., , Now select any image-- then click “OK”, , 5. Editing Group :, In editing group there are three options are available, i., , Find, , ii., , Replace, , iii., , Select All, , a. Find :, You can use this option to help you to find text quickly in a document, I., , Type some text, , II., , Go to “find” --Now “Find” dialog box will appear, , III., , Now inside the text box type a word that you want to find, , IV., , Then click “find next”
Page 13 :
b. Replace :, The replace option enable you to find text in a document and replace that text, with another text., I., , Type some text, , II., , Go to “replace” --Now “Replace” dialog box will appear, , III., , Now inside “Find” the text box type a word that you want to find, and replace with another word, , IV., , Then click “Replace” or “Replace all”, , c. Select all :, This function is used to select all the text in your document, I., II., , Type some text, Then click “Select all”, , B. VIEW TAB :, The home tab has 5 group, I., , Zoom, , II., , Show Or Hide, , III., , Setting, , a. Zoom :, This allow you to zoom in, zoom out, and set 100%, , b. Show or Hide :, I., , Tick the “Ruler” checkbox to show the ruler, , II., , Untick the “Ruler” checkbox to hide the ruler, , III., , Tick the “Status bar” checkbox to show the Status bar, , IV., , Untick the “Status Bar” checkbox to hide the Status bar, , c. Setting :, i. Word Wrap :, Click on the down arrow to change the way your page looks. In wordpad there, are three different views :, a. No Wrap, b. Wrap To Windows, c. Wrap To Ruller, Word wrap will not affect the printing of your document, ii. Measurement Unit :, You can set your computer to word in inches, centimeter, points, picas.
Page 14 :
C. Additional Wordpad Tools :, I., , Upper Left Corner : Quick Access Tool bar (QAT), I., , This tool bar appear on every Microsoft document., , II., , You can add features that you use frequently and delete the one you don’t., , III., , To add an icon to the QAT, a. Right click on the icon that you want to ease access., b. Now you see a drop down menu, c. Select “Add To Quick Access Tool Bar”, , II., , Upper Right Corner :, a. First icon is minimize – it will minimize your document and place it on the, taskbar., b. Second icon is restore – it will swing to full size (Maximize), or reduce it partly., So you can add second document along side the first document and view two, or more document at the same time., c. Third icon is close – it will close your document and take you out of wordpad., d. Question Mark -, , III., , I., , Under the three function icon, the question mark ( ? ) represent help., , II., , Click on the ? mark and view a mini tutorial about wordpad., , Scroll Bar :, This is the white bar on the right side of your screen., You can scroll your document up or down the page by clicking on the middle of, the scroll bar or dragging it up or down or you can scroll the scroll button on, your mouse., The top and bottom arrows on the scroll bar will move your document up or, down one line at the end of each click., Page up and page down on your keyboard will move text up or down one page, at a time.
 Learn better on this topic